If the sound pressure of the drums and bass is stable, the song will sound stable.
Use a compressor to create a mix with a sound that has a solid foundation.

When the sound pressure is not adjusted by a compressor, the drums have the same volume difference as when they are played.
The good thing about this is that it gives you a sense of realism and power when you listen to it at high volume.

If you adjust the sound pressure with a compressor, the difference between the intensity will be reduced.
The good thing about this is that it makes it easier to hear the whole drum regardless of the playback volume.
In other words, when releasing a CD or distribution, it is less affected by the playback environment of the listener, which is convenient.
The question always arises here.
Isn’t it possible to lose the intensity of the sound?
We can sense the intensity not only from the volume, but also from the tone.
Therefore, if you play a quieter tone, it will be heard as a quieter tone that can be heard better.
As long as you don’t change the tone to the point of ruining it, it will sound as if it is playing with intensity, which is fine.
The most important thing is to listen carefully and make sure that you are not applying too much compressor.
Let’s take a look at some specific adjustment tips.

A number of tutorials provide helpful compressor settings.
They will be useful after you understand how the compressor changes the sound.
First, let’s go to the extremes to experience the sound changes.
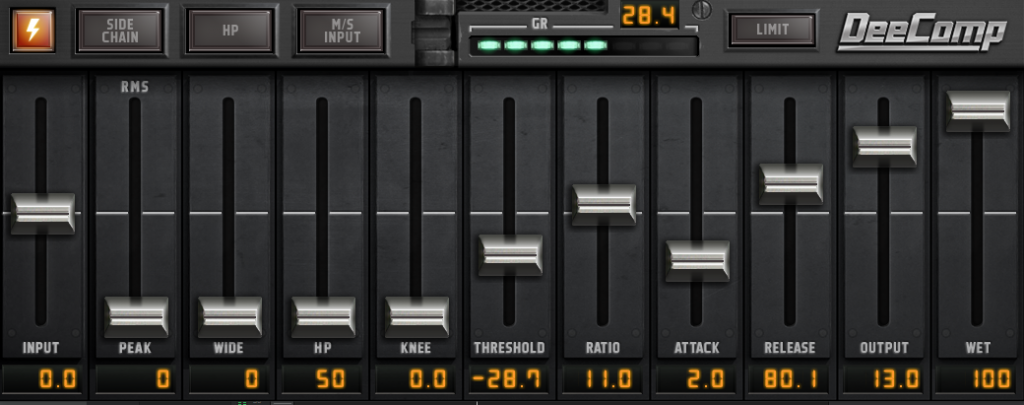
Insert the compressor and turn down the threshold to the extreme.
The gain reduction (GR) meter will move a lot and the volume will decrease, so turn up the output.
Depending on the compressor, the auto gain will work and the sound will change while the volume remains constant.
Doesn’t it sound weird, like a speaker in a box? This is a “too much” condition.
But at the same time, you can feel the positive effect of filling in the space between the drum sounds and increasing the density.
This is a sign of increased sound pressure due to the sustain effect that maintains the afterglow.

From that state, let’s bring it back to the best point.
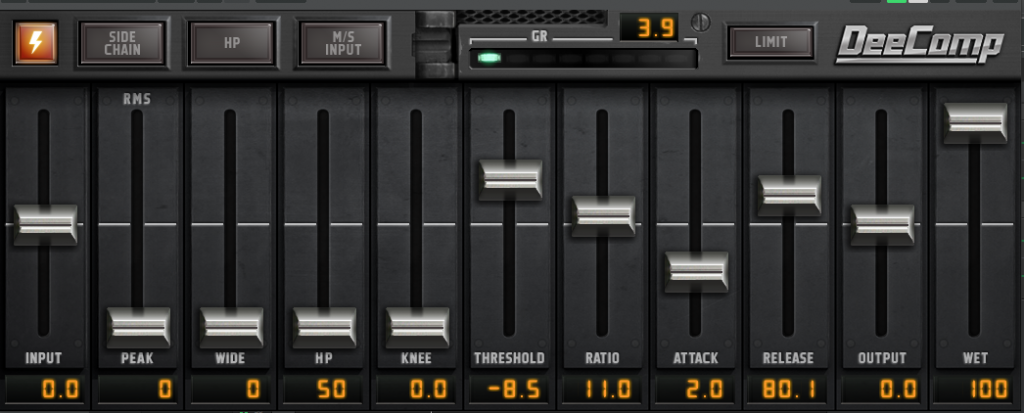
First, let’s turn back the threshold.
Stop at the point where the sound is no longer strange, and the GR has been reduced by 4 dB or so.
Now, since the volume will also return, lower the output and adjust the volume to an appropriate level.
It may sound like the sound before the compressor was applied.
However, if you bypass the compressor, you can clearly hear the difference in sound pressure.
Without the compressor, the sound will seem insufficient.
Now you have achieved the very important thing of applying a compressor in moderation.
There are many other parameters such as ratio, attack, release, and knee.
However, the most important thing is to be able to adjust the threshold to get the right compression.
If this basic setting is not set well, the other parameters will not work effectively.
By the way, the default settings are set by each manufacturer to be universally usable.
It is safe to say that the default settings are the ones that are taken care of the most in the presets.
When you purchase a new plug-in, it is recommended that you try the default settings.
I’ll explain how to set the attack and other settings in a separate article!
The Dee series I used this time is DeeComp. There is also a semi-automatic comp called DeeFat that can be set with a single slider, which is very useful.
There is also a product called DeeGraphComp that can be used to create effective sounds that are a little different from the ones we will be using.
All of these products have free demos, so please try them out!